
Underwater Photography in the Maldives: Red Disappears at Five Metres
Everybody comes back with blue photographs. The reef was orange and yellow and pink when you looked at it, the pictures are blue, and the usual conclusion is that the camera was not good enough.
The camera was fine. Water absorbs light by wavelength and red goes first — most of it gone by about five metres, orange by ten, yellow by twenty. At fifteen metres the only light reaching your sensor is the blue-green end of the spectrum, and megapixels do not fix that.
There are three solutions: get closer, bring your own light, or shoot shallow. This guide covers all three, the gear that makes sense here, and how some of your photographs can end up in a scientific database.

The physics, in one section
Water absorbs light selectively. Longer wavelengths go first, which means red, then orange, then yellow.
Red is effectively gone by five metres. Orange by ten. Yellow by twenty. Below that, everything is blue and green because that is all the light there is.
Distance counts as depth. Light travels from the surface down to your subject and then from your subject to your lens. A fish three metres away at ten metres deep is behind thirteen metres of water, not ten.
Which produces the most useful rule in the whole field: get closer. Halving the distance removes half the water column between lens and subject, and does more for colour than any equipment.
Suspended particles scatter light, producing the haze called backscatter, and the same fix applies. Less water between lens and subject means less to scatter.
The corollary: a wide-angle lens close to a large subject beats a zoom far from it, every time, in every condition. This is why underwater photographers use fisheye lenses on animals they could touch.
The three fixes
Get close. Free, and the most effective. It requires the animal to tolerate you, which means the etiquette in our turtle, manta and whale shark guides is also a photography technique. A calm diver who holds position gets closer than one who swims at things.
Shoot shallow, and shoot upward. In the top five metres the colours are still there. Angling the camera up puts the sun behind your subject and uses water as a backdrop rather than a filter. It is why the best snorkelling photographs are taken from below, looking up.
Bring light. A strobe or a video light restores the full spectrum at close range, and only at close range: light falls off rapidly, and a strobe illuminates a metre or two, not a reef.
And the fourth, conditional fix: a red filter. It rebalances ambient light in a depth band roughly between five and fifteen metres, in bright conditions, on wide scenes. It is useless below that, useless in poor light, and actively wrong when you are using a strobe, because it filters the light your strobe is providing. Filters are widely sold and widely misunderstood.
What gear actually makes sense
Four tiers, and the jump that matters is smaller than people expect.
A phone in a waterproof case. Genuinely capable in the top three to five metres in bright light, close to the subject. Beyond that the results are blue and soft. Cheap, and the right answer for most snorkellers.
An action camera. Wide by default, waterproof to snorkelling and shallow diving depths, and good in ambient light near the surface. Weak in low light, and the wide lens means you must be very close.
A compact camera in a housing. The first tier with real control — manual white balance, exposure compensation, and the option of adding a light later. This is where the results become noticeably better.
A mirrorless or DSLR in a housing, with strobes. Expensive, heavy in a seaplane baggage allowance, and capable of the photographs people frame.
What to rent rather than buy: most resort dive centres and several guesthouse operators rent cameras and lights — including on guesthouse islands where the day rates are a fraction of the resort equivalent.
What to bring regardless: a spare battery, a spare memory card, and something to dry the housing. Salt water and electronics have a short relationship.
Buoyancy is the camera skill
This is the part gear reviews never mention, and it matters more than the body you are holding.
A diver who cannot hover cannot photograph. Framing requires holding position, and holding position requires trim, breathing control and weighting — which is a diving skill rather than a photographic one. Our diving guide covers certification and technique.
A diver who cannot hover damages the reef. Fins on coral, hands on coral, a knee on a sponge for stability. The photographic instinct — get lower, get closer, brace — is exactly the instinct that breaks things, and Maldivian reefs are in no condition for it after the 2024 bleaching described in our reef health guide.
The rule, plainly: if you cannot take the shot without touching anything, you do not take the shot.
For snorkellers, the equivalent skill is floating still. A stationary snorkeller has animals approach; a thrashing one does not.
Practical consequence: dive twenty times before you dive with a camera. It is not a rule anyone enforces, and it is the difference between a diver with photographs and a photographer with a diving problem.
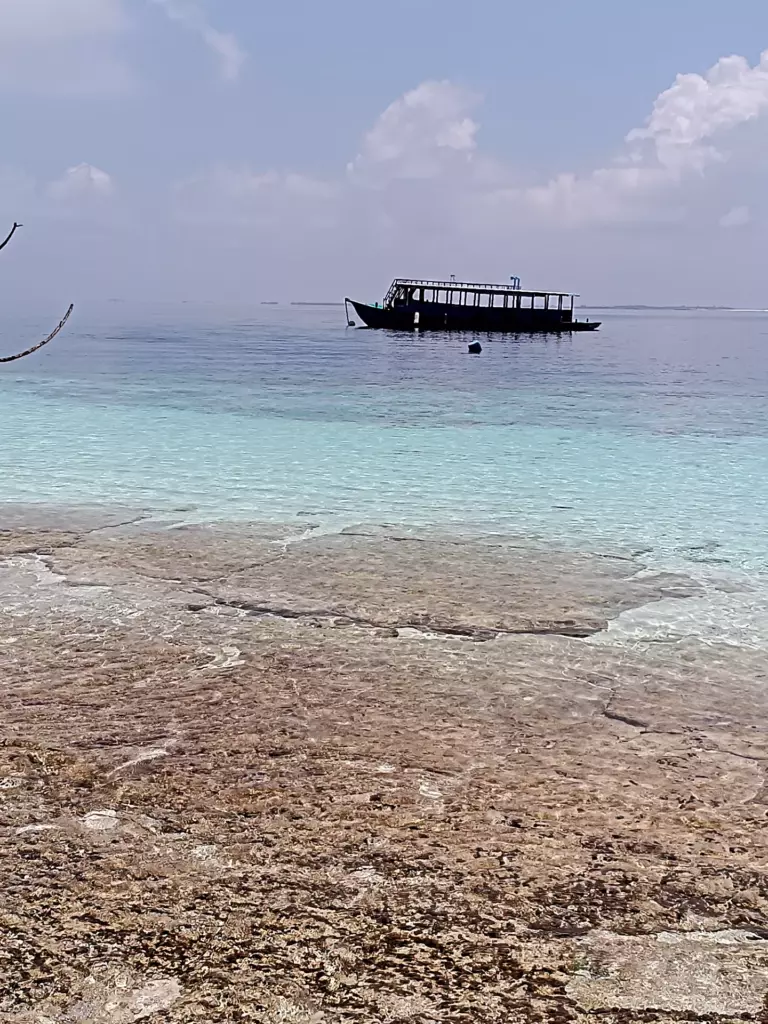
What the Maldives is good for
Different countries suit different photography, and this one is unambiguous.
This is wide-angle country. Big animals in blue water: mantas, whale sharks, reef sharks, eagle rays, schooling fish and turtles. Bring the wide lens.
Current is a feature and a problem. The channel diving of Vaavu and Ari delivers the animals, and it also means you are hooked onto rock with one hand and shooting with the other.
Macro exists and is secondary. Nudibranchs, shrimps and pipefish are on the reefs of Baa and every other atoll. Photographers who specialise in them generally go to Indonesia or the Philippines instead. If macro is your thing, bring the lens and adjust expectations.
Visibility is seasonal. Twenty-five to forty metres in the dry season, fifteen to twenty-five in the wet — and the wet season is when the plankton that reduces visibility brings the animals. Our diving season calendar explains the mechanism, and the trade-off is unavoidable: clear water or big animals, rarely both.
The light is exceptional. Equatorial sun, high angle, shallow reefs — and, on the monsoon pattern, most reliable in the dry months. Between about nine and three the top ten metres are as bright as underwater photography gets anywhere.
Settings, briefly
Not a manual, and five things worth knowing.
Shoot in the widest aperture your depth of field allows for available-light work, and stop down when using strobes.
Keep shutter speed above 1/125 for moving animals, faster for anything fast.
Set white balance manually if your camera allows it, against a neutral surface at your working depth. Auto white balance underwater is a guess.
Shoot raw if you have the option. Recovering colour in processing is far easier from raw than from a compressed file, and this is the single biggest quality difference available to a compact-camera user.
Bracket exposure on high-contrast scenes — a dark reef against bright blue water is exactly the situation that fools a meter.
And the one that is not a setting: take fewer, better frames. A hundred photographs of the same turtle from the same angle is what an unedited card looks like.
Snorkelling photography specifically
Most visitors will be doing this rather than diving, and it deserves its own treatment.
You are in the best light in the country. The top five metres, midday, over a reef — this is where colour survives.
Duck-diving improves everything, and it also has limits: equalise on the way down, never hold your breath on the way up, and never duck-dive alone. Our snorkelling guide covers the technique.
Shoot upward from below the subject, using the surface as a backdrop. This is the single most transformative composition change available to a snorkeller.
Get the sun behind you for colour, or directly behind the subject for silhouettes. Not sideways, which produces neither.
A phone works. Genuinely, in these conditions, at these depths, close to the subject.
Float still. Everything comes back to this.
Photographing at night
A different problem, and one the Maldives offers more of than most destinations.
Everything is lit by you. There is no ambient light to work with, which removes the colour problem entirely and replaces it with a lighting problem.
Backscatter is worse, because your light source and your lens are pointing the same way at the same particles. Move the light off to the side and angle it inward.
Focus is the hard part. A focus light — a continuous beam separate from the strobe — is what makes night photography possible rather than a lottery.
Subjects change. Nurse sharks, hunting jacks, sleeping turtles, octopus and the macro life that hides during daylight. Night sessions at Maaya Thila and Alimatha are among the better underwater photography opportunities in the country.
Night snorkelling is the accessible version, and our night snorkelling guide covers what is possible without a tank.
Bioluminescence is a separate problem entirely — long exposures, a tripod on a beach, no flash, and a dark moonless night. Our guide to bioluminescent beaches covers when it appears.
The photographs that are worth more than photographs
The most useful section in this article, and the one that ties the whole block together.
Three Maldivian animals are individually identifiable from photographs, and researchers use visitor images.
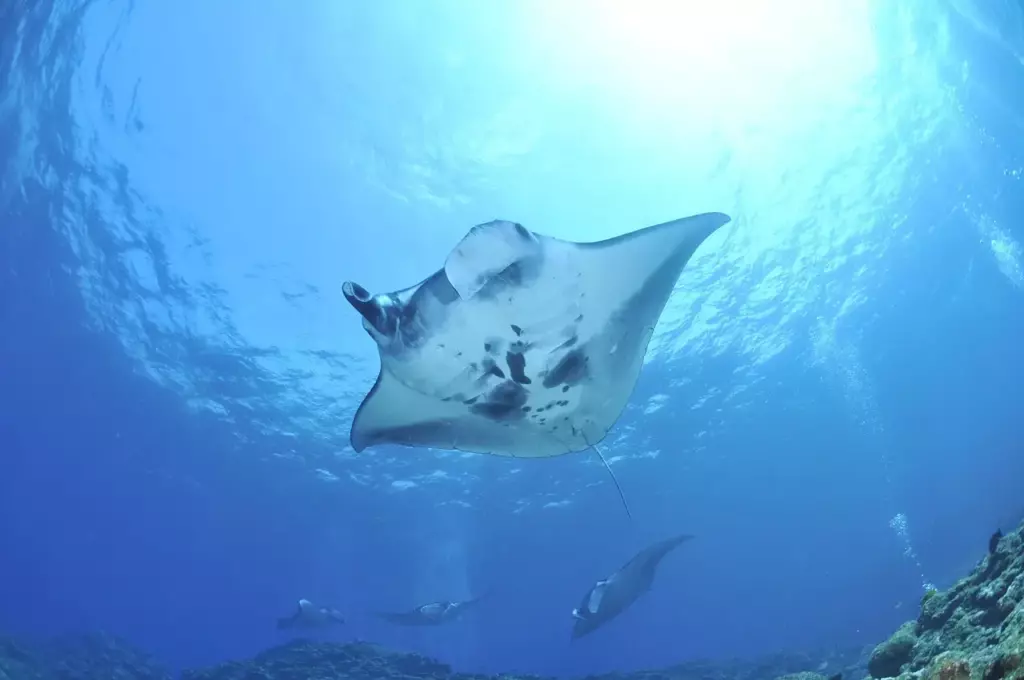
Manta rays carry a unique spot pattern on the underside. A photograph taken from below, square to the belly, contributes to the Manta Trust’s database of more than 6,000 identified individuals — the largest documented reef manta population on earth, described in our manta guide.
Whale sharks carry a unique spot pattern behind the gills. A side-on photograph of that area contributes to the identification catalogue in the South Ari protected area, which holds more than 726 individuals.

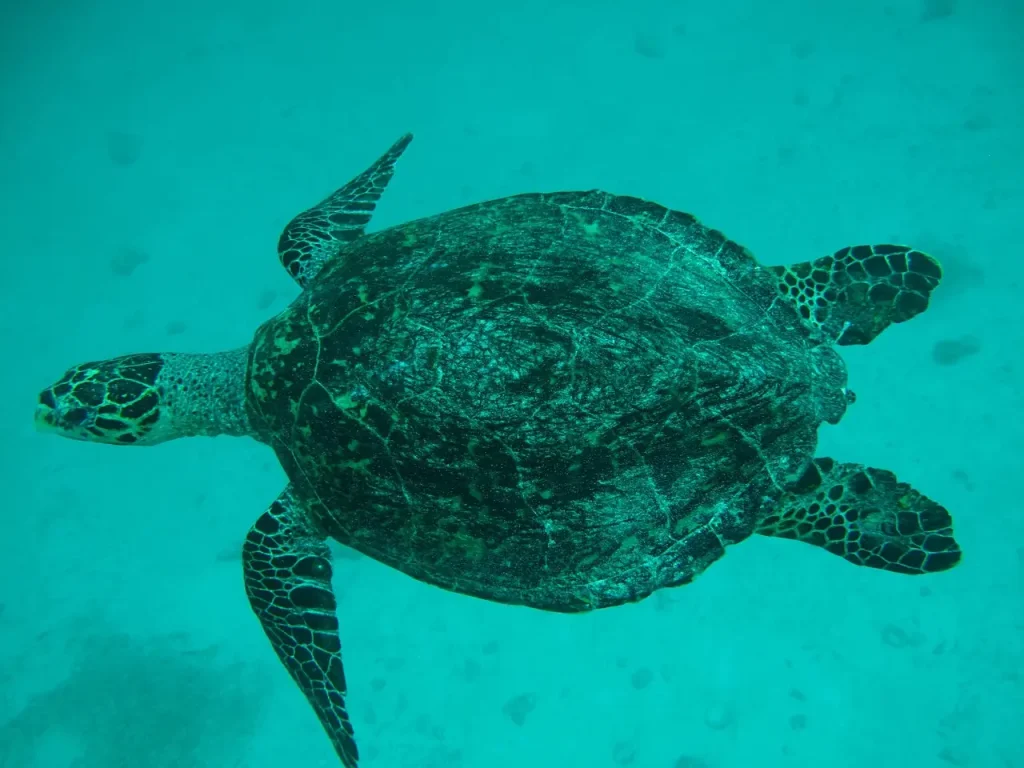
Turtles carry unique facial scale patterns. A side-on head shot, ideally both sides, contributes to identification work described in our turtle guide.

How to submit: ask your dive centre or guide, who will know the current route to the relevant project. Contact details change and a dead link is worse than none.
What this means practically: the frame that is useful to science is often the frame that is boring to look at — square-on, flat lighting, no composition. Take it anyway, then take the pretty one.
And the rule that overrides all of it: no photograph is worth pursuing an animal for. Every project doing this work would rather have no image than a stressed subject.
Above the surface, briefly
Half the photographs from a Maldives trip are taken in air, and three of them are worth planning for.
The aerial view on arrival. A seaplane transfer gives you the atoll structure from a thousand feet through a window, and it is the best aerial photograph most visitors will ever get without a drone. Sit on the side away from the sun and clean the window.
The sandbank. Shoot early or late, low and wide, and include the edge where white sand meets turquoise — our sandbank guide covers the timing, which is dictated by tide rather than light.
Sunset, which lasts about twenty minutes at this latitude, as our guide to the time zone explains. Be in position ten minutes early rather than arriving as it happens.
And the one to avoid: midday on white sand, which produces blown highlights and squinting faces, and is the single commonest technical failure in Maldivian holiday photography.
On inhabited islands, the rules about photographing people apply and matter more than any technique.
Etiquette, consolidated
The rules are the same across the block and they belong in one place for photographers.
Never touch anything. Coral, animals, the reef, the bottom.
Never chase. A pursued animal leaves. A patient photographer gets the shot.
Never block a turtle’s path to the surface. It has to breathe.
No flash on whale sharks or at Hanifaru, where it is prohibited outright.
Do not move animals to improve a composition. This happens with macro subjects and it is indefensible.
Do not stand on the reef to brace for a shot.
Drones need permission, are restricted, and resorts have their own policies — our guide to restricted items covers it.
Ask before photographing people, particularly on inhabited islands, where the rule is stricter than most visitors assume.
Practicalities
Rinse everything in fresh water immediately after every dive. Resorts and dive centres have rinse tanks for exactly this, and the camera tank is not the wetsuit tank.
Open the housing only when dry, and over a towel rather than over sand.
Check the O-ring every time. A hair on a seal floods a camera.
Charge overnight, because you will not get a second chance during a dive day, and power sockets here are the British three-pin type.
Cards fill faster than you think at raw settings, and there is no camera shop.
Baggage. A housing and strobes are heavy, and the seaplane allowance is 20 kg checked plus 5 kg cabin. Fragile gear goes in the cabin bag, which may be the only bag that arrives with you.
Insurance. Standard travel policies rarely cover a flooded camera, and several exclude water sports outright — the same wording problem our guide to missed connections and cover describes. Specialist cover exists.
Post-processing, honestly
Where a large share of the difference is actually made.
Colour recovery is the main job. Raw files from ten metres contain more red than the preview suggests, and pulling it back is routine rather than cheating.
White balance first, then exposure, then contrast. In that order.
Backscatter removal is tedious and effective on shallow shots with particles.
Do not overdo the blues. The over-saturated turquoise look is the tell of an amateur edit, and the real thing is subtler.
Crop honestly. Cropping to make an animal look closer than you were is fine aesthetically and misleading if the image is presented as documentation.
Keep the original files. Identification photographs need to be submitted unedited or minimally edited, because researchers are reading pattern rather than looking at art.
Is a camera worth bringing at all?
An honest question, and the answer is not always yes.
On a first diving trip: no. Twenty dives before a camera is good advice and few people take it, particularly on a first visit when everything is new.
As a snorkeller: a phone in a case, yes. Cheap, effective in the right conditions, and it will not dominate the swim.
For a serious photographer: obviously. The Maldives is a wide-angle destination with world-class animals and exceptional light.
For everyone in between: rent first. Dive centres rent, and a week with a rented compact tells you more than any review — the same logic our snorkelling guide applies to buying a mask.
And the argument against: a camera changes what you do underwater. You stop looking and start hunting, and the people who have the best time in the water are frequently the ones with nothing in their hands. Our activities overview makes the same point about over-scheduling a week — the country rewards attention rather than acquisition.
Questions travellers ask
Why are my underwater photos blue? Water absorbs light by wavelength. Red is gone by about five metres, orange by ten and yellow by twenty, so only blue-green light reaches your camera. The fixes are getting closer, shooting shallower, or bringing your own light.
Do I need an expensive camera? No. A phone in a waterproof case works well in the top three to five metres in bright light, close to the subject. The jump that matters is a housing with manual white balance rather than more megapixels.
Do red filters work? In a band roughly between five and fifteen metres, in bright ambient light, on wide scenes. They are useless deeper, useless in low light and wrong when you are using a strobe, because they filter the strobe’s own light.
What lens should I bring to the Maldives? Wide. This is big-animal, blue-water country — mantas, whale sharks, sharks and turtles. Macro exists and is secondary here compared with Indonesia or the Philippines.
When is visibility best? The dry season, December to April, at twenty-five to forty metres. The wet season drops to fifteen to twenty-five and brings the plankton that attracts the big animals, so the trade-off is clarity against subjects.
Can my photographs help research? Yes. Manta belly spots, whale shark spot patterns behind the gills and turtle facial scales are all unique identifiers used in identification databases. Ask your dive centre how to submit.
What is the most important skill? Buoyancy. A diver who cannot hold position cannot frame a shot and will end up bracing on the reef. Learn to dive properly before adding a camera.
Can I use flash? Not on whale sharks, and not at Hanifaru Bay, where it is prohibited. Elsewhere, strobes are standard for close work — but they only illuminate a metre or two, so you still have to get close.
What to take away
- Red disappears by about five metres, orange by ten, yellow by twenty. That is why your photographs are blue, and no camera fixes it.
- Distance counts as depth. Getting closer does more for colour than any equipment upgrade.
- Shoot shallow and upward. The best snorkelling photographs are taken from below the subject looking up.
- Buoyancy is the camera skill. A diver who cannot hover cannot frame a shot and will damage reef trying.
- Manta bellies, whale shark spots and turtle facial scales are unique identifiers, and your photographs of them can contribute to research databases.
Next step: before you buy anything, take your phone in a case out on the house reef at ten in the morning and swim to within a metre of something. That single change — distance, not equipment — is the difference between the blue photographs you have been taking and the ones you wanted.